Motorcycle Rider Training and Safety Tips
1.How to Negotiate Decreasing-Radius Corners
Perhaps no corners strike greater fear in the hearts of motorcyclists than decreasing radius corners. However, the corners themselves aren't really the cause for the concern. It's the surprise of entering an unfamiliar corner, setting your speed and your line, only to suddenly have the rules change midway.
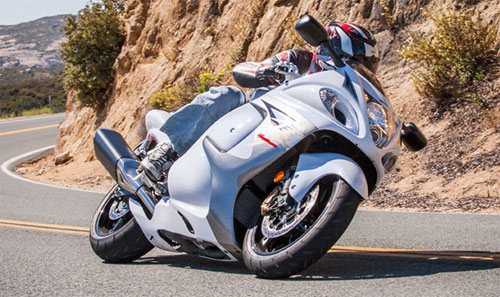
Remember that, despite the surprise, if your bike isn't dragging hard parts, you have the ground clearance to lean the bike over even more - probably more than you think.
Before we discuss the challenge of decreasing radius corners, we should quickly review an easy one. This will make sure we have the same techniques in mind. In an idealized constant-radius corner, the rider can see from entry to exit. So, the bike's approach would be wide at the entrance, and setting the appropriate speed before the turn-in point.
A rider should look through the corner, initiate the turn, and begin rolling on the throttle. Rolling on the throttle settles the suspension and keeps the bike from falling into the corner as the bike heads towards the apex. After the apex, acceleration can increase as the bike begins to stand up, putting a larger footprint on the pavement and following its line to the outside of its lane at the exit of the corner.
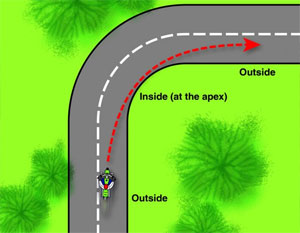 The ideal line through a constant radius curve starts wide at the entrance, tightens to the apex, and then exits wide.
Photo courtesy of the Motorcycle Safety Foundation.
The ideal line through a constant radius curve starts wide at the entrance, tightens to the apex, and then exits wide. Photo courtesy of the Motorcycle Safety Foundation.
If the entire corner could be seen at the entry, the tightening of a radius could be planned for from the beginning - just like with our idealized corner. So, in order to address the fear of the decreasing radius, we should look at the proper way through the corner and then backtrack to see how we can apply this knowledge to corner entry - even when we don't know a decreasing radius lies ahead.
Motorcycle Cornering Clearance � What To Do When It Runs Out
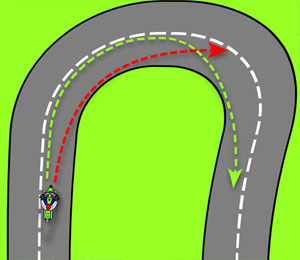
If we treat a decreasing-radius corner like a constant-radius one, the line takes us off the road as the curve tightens. Holding a wide line gives us maximum flexibility to modify our line as the corner's radius tightens.
If you're taking the classic line through a corner and the radius tightens - even just a little - it will have the same effect as early apexing a corner: The bike will run wide at the exit. So, when approaching a decreasing-radius corner, the best tactic for a street rider would be to set the entry speed for the tighter portion of the curve, hold a wide line at the entrance of the corner, and dial in more lean until the line heads towards the apex of the tightened radius.
Newer riders will want to set a slower speed at the actual corner entry. For more advanced riders, trail braking through the initial corner to the tighter section can be utilized as long as you're cognizant that traction for braking is reduced by cornering forces. Smooth application of the brakes is paramount, as an abrupt spike in brake pressure - or abruptly chopping the throttle - can cause traction loss and send you tumbling.
While traction for braking in a corner is limited, entering the corner trailing the brakes and having the bike's weight shifted on to the front end actually helps with steering input. The fork's rake angle decreases as it compresses, making the bike respond more quickly to steering input. You have also compressed the tire, giving it a larger contact patch and more traction.
However, the harder you're cornering, the thinner the line is between having enough grip to brake while leaned over and a low-side crash. Once initiating your line in the tighter section of the corner, begin accelerating for the exit as you normally would.
In the example above, we assumed we could see the entire corner and, therefore, could plan accordingly. However, on the street, you will frequently enter corners where you can't see the exit. While you can draw clues for where the corner goes from trees or telephone poles or fence lines, these can be misleading. (Have you ever been following a row of telephone poles for miles only to see them go straight off into a field while the road makes a turn?)
Proper Motorcycle Lane Positioning
So, when riding on an unfamiliar road, you should always hold at least 20 percent of your skill set, traction, and ground clearance in reserve for the unexpected - which could come in the form of a tightening radius, an obstacle, liquid, a bicyclist, or any other of the myriad of things you might encounter in the real world.
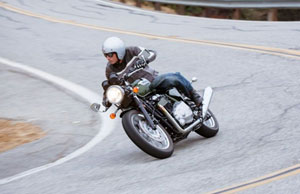 The rider's wide initial line gives him the time to detect a decreasing-radius turn and begin tightening his line.
The prudent street rider will set road speed based on the radius of the corner at its entry (while keeping that 20 percent reserve) but will maintain a wide line. Once the corner's exit is spotted, the final line, which clips the apex, can be selected. A wide line gives the maximum view of the road ahead, increasing the time to react to the unexpected. Even while holding the wide line, you can accelerate through the corner to settle the suspension as you normally would. If a corner begins to tighten up, you have that reserved cornering clearance to dip in to.
The rider's wide initial line gives him the time to detect a decreasing-radius turn and begin tightening his line.
The prudent street rider will set road speed based on the radius of the corner at its entry (while keeping that 20 percent reserve) but will maintain a wide line. Once the corner's exit is spotted, the final line, which clips the apex, can be selected. A wide line gives the maximum view of the road ahead, increasing the time to react to the unexpected. Even while holding the wide line, you can accelerate through the corner to settle the suspension as you normally would. If a corner begins to tighten up, you have that reserved cornering clearance to dip in to.
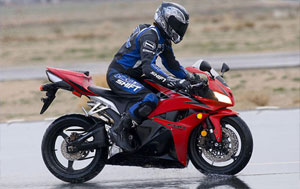
 The rider has chosen his line through the tighter section of the curve and is already looking ahead to the next corner.
If you suspect the changing radius will ask for more ground clearance than you have, you can modify your speed - or prevent it from increasing - by lightly applying the rear brake and maintaining a neutral throttle. If the corner requires that you slow even more, roll off the throttle - do not chop it - and smoothly apply the brakes. When practicing this technique, notice how, when you decelerate while leaned over, your line will naturally tighten, aiding in achieving your desired path through the corner. After you've set your new line, treat the corner's exit just like every other corner.
The rider has chosen his line through the tighter section of the curve and is already looking ahead to the next corner.
If you suspect the changing radius will ask for more ground clearance than you have, you can modify your speed - or prevent it from increasing - by lightly applying the rear brake and maintaining a neutral throttle. If the corner requires that you slow even more, roll off the throttle - do not chop it - and smoothly apply the brakes. When practicing this technique, notice how, when you decelerate while leaned over, your line will naturally tighten, aiding in achieving your desired path through the corner. After you've set your new line, treat the corner's exit just like every other corner.
One other tactic for solving the decreasing-radius corner dilemma should be mentioned, although it applies more to the track or roads with which you are familiar. When you know a corner has a decreasing radius before you enter it, double apexing a turn essentially turns the corner in two with each being dealt with separately. However, we'll discuss this technique in a future article.
Motorcycle Downshifting Techniques
Decreasing-radius corners are just another part of the enjoyable challenge of riding motorcycles. If you practice these techniques, you'll have them to draw on in an instant when a blind curve becomes more challenging than it initially looked.
2.Motorcycle Downshifting Techniques
One of the hallmarks of proficient motorcyclists is the smoothness with which they apply the controls. Downshifting and braking are two of the skills that require the most finesse. Get ham-fisted with either, and you will display (and anyone riding with you will see) the telltale bobbing of an unsettled chassis � or worse, crash. This is why novices are recommended to master the basics of both braking and downshifting separately before trying to cram them together while rushing headlong into a corner.
In its most basic sense, downshifting consists of just three things: pulling in the clutch lever, pressing down on the shifter, and letting the clutch lever back out. However, there's the important issue of matching the engine speed to the road speed. Most beginning rider courses emphasize a slow release of the clutch lever which allows the engine speed to rise to meet the road speed.
But do it too abruptly, and you'll get a lurch � as if you briefly mashed on the rear brake. In extreme examples, this can lead to rear wheel hop, which explains why many sport/racing-oriented motorcycles have a slipper clutch. While a slow-release clutch method of bringing the rpm up to the right range is an effective tool � and teaches good clutch control � it isn't terribly efficient. Multiple downshifts will take something just short of an eternity.
Proper Motorcycle Lane Positioning
As riders progress up the skills curve, they begin to combine a faster clutch release with a blip of the throttle. When it works, the downshift is so smooth as to be imperceptible. If the revs drop and then rise again as you let out the clutch, you need to give a little more throttle before releasing the clutch. If the bike surges forward, give less throttle. Either way, the chassis is upset, and your nice, tidy line through the corner becomes more difficult.
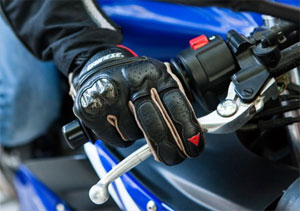 While maintaining a constant pressure on the brake, let your fingers slide over the lever while you blip the throttle for the downshift.
While you practice matching the engine speed to the bike's road speed, make the corner entries easier by separating the braking and getting it done early. Practice downshifting at every opportunity you get until you no longer have to think about how much throttle is required until the process becomes second nature.
While maintaining a constant pressure on the brake, let your fingers slide over the lever while you blip the throttle for the downshift.
While you practice matching the engine speed to the bike's road speed, make the corner entries easier by separating the braking and getting it done early. Practice downshifting at every opportunity you get until you no longer have to think about how much throttle is required until the process becomes second nature.
Now the real fun begins: combining the braking and downshifting. If you weren't already riding with two fingers on the brake lever at all times, you need to be doing it now. Also, placing your hand in the proper position on the grip will make the process easier. When the throttle is completely closed, your wrist should still have a slight downward bend � not choked-up drag racer style � as you rest your fingers on the brake lever.
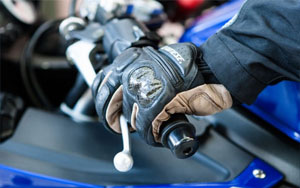
 Having the wrist in a level or slightly down position makes it easier to operate the brake and throttle simultaneously.
Before you practice this technique on the road, sit on your bike in your driveway and rehearse maintaining a constant pressure on the brake lever while rolling the throttle on and off. Remember, although it's a challenge to modulate the brake and throttle simultaneously, you will be able to greatly compress the distance it takes to slow and downshift once you've mastered the skill.
Having the wrist in a level or slightly down position makes it easier to operate the brake and throttle simultaneously.
Before you practice this technique on the road, sit on your bike in your driveway and rehearse maintaining a constant pressure on the brake lever while rolling the throttle on and off. Remember, although it's a challenge to modulate the brake and throttle simultaneously, you will be able to greatly compress the distance it takes to slow and downshift once you've mastered the skill.
While the right side of your body is handling the brakes and the throttle, the left side of your body will be busy shifting gears and modulating the clutch. Here's one secret to make downshifting easier: You only need to pull in the lever far enough to disengage the clutch plates. Pulling the lever all the way in is wasted effort that makes it more difficult to shift smoothly.
Motorcycle Riding in the Wind and Rain
Some riders make the movement easier by covering the clutch lever with two fingers. Bumping the lever against your other fingers will remind you when you've pulled it in too far. (To make sure you fully disengage the clutch at a stop, continue to use all four fingers.)
 The clutch lever has been pulled in too far once it hits your fingers. Efficiency of movement makes for smoother downshifts.
There's a trick for your foot, too: Although downshifting appears to be simultaneous to the clutch action, you'll want to preload the shifter by pressing down on it just before you disengage the clutch so the transmission will slip right into the next gear. Release the shifter as you normally would when the clutch is fully engaged.
The process is the same no matter how many gears you're going down through. Just let the clutch out fairly quickly between each shift. Don't tap down more than one gear while the clutch is in. Getting the downshift(s) done early in the braking will help mask any slight mistakes you make in matching the engine speed. This also lets you focus on setting your corner entry speed and getting off the brakes at the proper time.
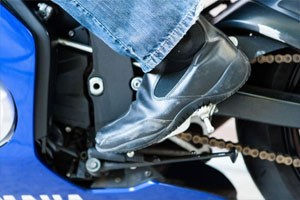
The rider's toe is pressing down on the shifter against the transmission's resistance. As soon as the clutch is disengaged, the lever will snick it into the lower gear.
Eliminating unnecessary movement from gear changes will help downshifts go much smoother. For clutch operation with a minimum of finger movement, make sure the point of full clutch disengagement is as far out from the grip as possible while still allowing for 2 to 3mm of freeplay at the end of the lever. Similarly, the gearshift lever should be set so that you don't need to lift your foot off the peg to press down on the shifter, but don't set it so low that it compromises upshifts.
How to Load your Motorcycle
Becoming proficient in simultaneous braking and downshifting will pay dividends in the city, highway and track. By being in the correct gear for your speed, you will be able to motor away from trouble around town or stabilize the chassis for the acceleration from a canyon road's corner exit. All it takes is practice.
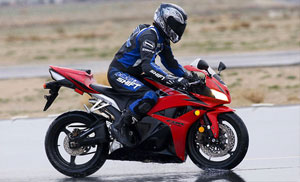
Smoothly braking while downshifting is perhaps the most difficult motorcycle skill to master. Doing it in the wet earns bonus points.
3.How to Load your Motorcycle
Smoothly braking while downshifting is perhaps the most difficult motorcycle skill to master. Doing it in the wet earns bonus points. Becoming proficient in simultaneous braking and downshifting will pay dividends in the city, highway and track. By being in the correct gear for your speed, you will be able to motor away from trouble around town or stabilize the chassis for the acceleration from a canyon road's corner exit. All it takes is practice.